Source:-blog.logrocket
Full-text search can be both scary and exciting. Some popular databases such as MySql and Postgres are an amazing solution for storing data… but when it comes to full-text search performances, there’s no competition with ElasticSearch.
For those who don’t know, ElasticSearch is a search engine server built on top of Lucene with an amazing distributed-architecture support. According to db-engines.com, it is currently the most used search engine out there.
In this post, we are going to build a simple REST application called The Quotes Database which will allow us to store and search as many quotes as we want.
I’ve prepared a JSON file containing 5000+ quotes with their authors, we’ll be using it as our starting data for populating ElasticSearch.
Setting up Docker
First of all, we don’t want to install ElasticSearch on our machine. We’ll be using Docker for orchestrating both the Node.js server and the ES instance on a container, which will allow us to deploy a production-ready application with all the dependencies that it needs.
Let’s create a Dockerfile inside our project root folder:
FROM node:10.15.3-alpine

WORKDIR /usr/src/app

COPY package*.json ./

RUN npm install
RUN npm install -g pm2

COPY . ./

EXPOSE 3000
EXPOSE 9200

CMD npm run start
As you can see, we’re telling Docker that we’ll run a Node.js 10.15.3-alpine runtime. We’ll also create a new working directory under /usr/src/app, where we’ll copy both the package.json and the package-lock.json files. That way, Docker will be able to run npm install inside our WORKDIR, installing our needed dependencies.
We’ll also install PM2 by running RUN npm install -g pm2. The Node.js runtime is single-threaded, so if a process crashes, the entire app needs to be restarted… PM2 checks the Node.js process status and restarts it when the app goes down for any reason.
After installing PM2, we’ll copy our codebase inside our WORKDIR (COPY . ./), and we tell Docker to expose two ports, 3000, which will expose our RESTful service, and 9200, which exposes the ElasticSearch service (EXPOSE 3000 and EXPOSE 9200).
Last but not least, we tell Docker which command will start the Node.js app with npm run start.
Setting up docker-compose
Now you may be saying, ‘Great, I get it! But how do I handle the ElasticSearch instance inside Docker? I can’t find it in my Dockerfile!’… you’re right! That’s where docker-compose becomes useful. It allows us to orchestrate multiple Docker containers and to create a connection between them. So, let’s write down the docker-compose.yml file, which will be stored inside our project root directory:
version: '3.6'
services:
  api:
    image: node:10.15.3-alpine
    container_name: tqd-node
    build: .
    ports:
      - 3000:3000
    environment:
     - NODE_ENV=local
     - ES_HOST=elasticsearch
     - NODE_PORT=3000
     - ELASTIC_URL=http://elasticsearch:9200
    volumes:
      - .:/usr/src/app/quotes
    command: npm run start
    links:
        - elasticsearch
    depends_on:
        - elasticsearch
    networks:
      - esnet
  elasticsearch:
    container_name: tqd-elasticsearch
    image: docker.elastic.co/elasticsearch/elasticsearch:7.0.1
    volumes:
      - esdata:/usr/share/elasticsearch/data
    environment:
      - bootstrap.memory_lock=true
      - "ES_JAVA_OPTS=-Xms512m -Xmx512m"
      - discovery.type=single-node
    logging:
      driver: none
    ports:
      - 9300:9300
      - 9200:9200
    networks:
      - esnet
volumes:
  esdata:
networks:
  esnet:
This is a bit more complex than our Dockerfile, but let’s analyze it:
- We declare which version of
docker-compose.ymlfile we’re using (3.6) - We declare our services:
api, which is our Node.js app. Just like in our Dockerfile, it requires thenode:10.15.3-alpineimage. We also assign a name to this containertqd-node, and here we call the previously created Dockerfile using thebuild .command.- We need to expose the
3000port so we write these statements as follows3000:3000. It means that we’re mapping from the port3000(inside our container) to the port3000(accessible from our machine). Then we’ll set some environment variables. The valueelasticsearchis a variable which refers to theelasticsearchservice inside ourdocker-compose.ymlfile. - We also want to mount a volume
/usr/src/app/quotes. That way, once we restart our container we’ll maintain our data without losing it. - Once more, we tell Docker which command we need to execute once the container starts up, then we set a link to the
elasticsearchservice. We also tell Docker to start theapiservice after theelasticsearchservice has booted (using thedepends_ondirective). - Last but not least, we tell Docker to connect the
apiservice under theesnetnetwork. That’s because every container has its own network. That way, we say thatapiandelasticsearchservices shares the same network so they will be able to call each other with the same ports. elasticsearch, which is (as you may have guessed) our ES service. It’s configuration is pretty similar to theapiservice. We’ll just cut off its verbose logs setting theloggingdirective todriver: none.
- We also declare our volumes, where we store the ES data.
- And we declare our network,
esnet.
Bootstrapping the Node.js app
Now we need to create our Node.js application, so let’s get started setting up our package.json file:
npm init -y
Now we need to install some dependencies:
npm i -s @elastic/elasticsearch body-parser cors dotenv express
Great! Our package.json file should look like this:
{
  "name": "nodejselastic",
  "version": "1.0.0",
  "description": "",
  "main": "index.js",
  "scripts": {
    "test": "echo \"Error: no test specified\" && exit 1"
  },
  "keywords": [],
  "author": "",
  "license": "ISC",
  "dependencies": {
    "@elastic/elasticsearch": "^7.3.0",
    "body-parser": "^1.19.0",
    "cors": "^2.8.5",
    "dotenv": "^8.0.0",
    "express": "^4.17.1"
  }
}
Let’s implement our ElasticSearch connector in Node.js. First, we need to create a new /src/elastic.js file:
const { Client } = require("@elastic/elasticsearch");
                   require("dotenv").config();

const elasticUrl = process.env.ELASTIC_URL || "http://localhost:9200";
const esclient   = new Client({ node: elasticUrl });
const index      = "quotes";
const type       = "quotes";
As you can see, here we set some constants that will be incredibly useful. First of all, we create a new connection to ElasticSearch using its official Node.js SDK, then we define an index ("quotes") and an index type("quotes" again, we’ll see later what they mean).
Now we need to create an index on ElasticSearch. You can think of “indexes” as a SQL “database” equivalent. ElasticSearch is a NoSQL database, which means that it has no tables — it just stores JSON documents. An index is a logical namespace which maps to one or more primary shards and can have zero or more replica shards. You can read more about ElasticSearch indexes here.
Let’s now define a function that will create our index:
async function createIndex(index) {
  try {
    await esclient.indices.create({ index });
    console.log(`Created index ${index}`);
  } catch (err) {
    console.error(`An error occurred while creating the index ${index}:`);
    console.error(err);
  }
}
Now we need another function that creates the mapping for our quotes. The mapping defines the schema and types of our document:
async function setQuotesMapping () {
  try {
    const schema = {
      quote: {
        type: "text"
      },
      author: {
        type: "text"
      }
    };

    await esclient.indices.putMapping({
      index,
      type,
      include_type_name: true,
      body: {
        properties: schema
      }
    })

    console.log("Quotes mapping created successfully");
  } catch (err) {
    console.error("An error occurred while setting the quotes mapping:");
    console.error(err);
  }
}
As you can see, we’re defining the schema for our documents, and we’re inserting it inside our index.
Now let’s consider that ElasticSearch is a huge system and can take some seconds to boot up. We can’t connect to ES until it is ready, so we need a function that checks when the ES server is ready:
function checkConnection() {
  return new Promise(async (resolve) => {
    console.log("Checking connection to ElasticSearch...");
    let isConnected = false;
    while (!isConnected) {
      try {
        await esclient.cluster.health({});
        console.log("Successfully connected to ElasticSearch");
        isConnected = true;
      // eslint-disable-next-line no-empty
      } catch (_) {
      }
    }
    resolve(true);
  });
}
As you can see, we’re returning a promise. That’s because by using async/await we’re able to stop the entire Node.js process until this promise resolves, and it won’t do it until it connects to ES. That way, we force our Node.js to wait for ES before booting up.
We’re done with ElasticSearch! Now let’s export our functions:
module.exports = {
  esclient,
  setQuotesMapping,
  checkConnection,
  createIndex,
  index,
  type
};
Great! Let’s see the entire elastic.js file:
const { Client } = require("@elastic/elasticsearch");
                   require("dotenv").config();
const elasticUrl = process.env.ELASTIC_URL || "http://localhost:9200";
const esclient   = new Client({ node: elasticUrl });
const index      = "quotes";
const type       = "quotes";
/**
 * @function createIndex
 * @returns {void}
 * @description Creates an index in ElasticSearch.
 */
async function createIndex(index) {
  try {
    await esclient.indices.create({ index });
    console.log(`Created index ${index}`);
  } catch (err) {
    console.error(`An error occurred while creating the index ${index}:`);
    console.error(err);
  }
}
/**
 * @function setQuotesMapping,
 * @returns {void}
 * @description Sets the quotes mapping to the database.
 */
async function setQuotesMapping () {
  try {
    const schema = {
      quote: {
        type: "text"
      },
      author: {
        type: "text"
      }
    };

    await esclient.indices.putMapping({
      index,
      type,
      include_type_name: true,
      body: {
        properties: schema
      }
    })

    console.log("Quotes mapping created successfully");

  } catch (err) {
    console.error("An error occurred while setting the quotes mapping:");
    console.error(err);
  }
}
/**
 * @function checkConnection
 * @returns {Promise<Boolean>}
 * @description Checks if the client is connected to ElasticSearch
 */
function checkConnection() {
  return new Promise(async (resolve) => {
    console.log("Checking connection to ElasticSearch...");
    let isConnected = false;
    while (!isConnected) {
      try {
        await esclient.cluster.health({});
        console.log("Successfully connected to ElasticSearch");
        isConnected = true;
      // eslint-disable-next-line no-empty
      } catch (_) {
      }
    }
    resolve(true);
  });
}
module.exports = {
  esclient,
  setQuotesMapping,
  checkConnection,
  createIndex,
  index,
  type
};
Populating ElasticSearch with quotes
Now we need to populate our ES instance with our quotes. This may sound easy, but believe me, it can be tricky.
Let’s create a new file in /src/data/index.js:
const elastic = require("../elastic");
const quotes  = require("./quotes.json");

const esAction = {
  index: {
    _index: elastic.index,
    _type: elastic.type
  }
};
As you can see, we’re importing the elastic module we just created and our quotes from a JSON file stored in /src/data/quotes.json. We’re also creating an object called esAction, which will tell ES how to index a document once we insert it.
Now we need a script to populate our database. We also need to create an array of Object with the following structure:
[
  {
    index: {
      _index: elastic.index,
      _type:  elastic.type
    }
  },
  {
    author: "quote author",
    quote:  "quote"
  },
  ...
]
As you can see, for each quote we’re gonna insert, we need to set its mapping to ElasticSearch. So that’s what we’ll do:
async function populateDatabase() {
  const docs = [];
  for (const quote of quotes) {
    docs.push(esAction);
    docs.push(quote);
  }
  return elastic.esclient.bulk({ body: docs });
}
Great! Now let’s create our main file in /src/main.js and see how we’ll structure everything we’ve written so far:
const elastic = require("./elastic");
const data    = require("./data");
                require("dotenv").config();

(async function main() {

  const isElasticReady = await elastic.checkConnection();
  if (isElasticReady) {
    const elasticIndex = await elastic.esclient.indices.exists({index: elastic.index});

    if (!elasticIndex.body) {
      await elastic.createIndex(elastic.index);
      await elastic.setQuotesMapping();
      await data.populateDatabase()
    }
  }

})();
Let’s analyze the code above. We create a self-executing main function which will check for the ES connection. The code execution won’t proceed until ES is connected. When ES is ready, we’ll check if the quotes index exists. If it doesn’t, we’ll create it, we’ll set its mapping and will populate the database. Obviously, we’ll do so only the first time we start up our server!
Creating a RESTful API
Now we need to create our RESTful server. We’ll be using Express.js, which is the most popular Node.js framework out there for building servers.
We’ll start with the /src/server/index.js file:
const express      = require("express");
const cors         = require("cors");
const bodyParser   = require("body-parser");
const routes       = require("./routes");
                     require("dotenv").config();

const app  = express();
const port = process.env.NODE_PORT || 3000;

function start() {
  return  app.use(cors())
             .use(bodyParser.urlencoded({ extended: false }))
             .use(bodyParser.json())
             .use("/quotes",routes)
             .use((_req, res) => res.status(404).json({ success: false,error: "Route not found" }))
             .listen(port, () => console.log(`Server ready on port ${port}`));
}

module.exports = {
  start
};
As you can see, it is just a standard Express.js server, we won’t spend much time on that.
Let’s see our /src/server/routes/index.js file:
const express    = require("express");
const controller = require("../controllers");
const routes     = express.Router();

routes.route("/").get(controller.getQuotes);
routes.route("/new").post(controller.addQuote);

module.exports = routes;
We just create two endpoints:
GET /, will return a list of quotes matching our query string parameters.POST /new/, will allow us to post a new quote storing it inside ElasticSearch.
So now let’s see our /src/server/controllers/index.js file:
const model = require("../models");

async function getQuotes(req, res) {
  const query  = req.query;
  if (!query.text) {
    res.status(422).json({
      error: true,
      data: "Missing required parameter: text"
    });
    return;
  }
  try {
    const result = await model.getQuotes(req.query);
    res.json({ success: true, data: result });
  } catch (err) {
    res.status(500).json({ success: false, error: "Unknown error."});
  }
}

async function addQuote(req, res) {
  const body = req.body;
  if (!body.quote || !body.author) {
    res.status(422).json({
      error: true,
      data: "Missing required parameter(s): 'body' or 'author'"
    });
    return;
  }
  try {
    const result = await model.insertNewQuote(body.quote, body.author);
    res.json({
      success: true,
      data: {
        id:     result.body._id,
        author: body.author,
        quote:  body.quote
      }
    });
  } catch (err) {
    res.status(500).json({ success: false, error: "Unknown error."});
  }
}
module.exports = {
  getQuotes,
  addQuote
};
Here we’re basically defining two functions:
getQuotes, which requires at least one querystring parameter –textaddQuote, which require two parameters –authorandquote
The ElasticSearch interface is delegated to our /src/server/models/index.js. This structure helps us maintain a MVC-ish architecture.
Let’s see our model:
const { esclient, index, type } = require("../../elastic");

async function getQuotes(req) {
  const query = {
    query: {
      match: {
        quote: {
          query: req.text,
          operator: "and",
          fuzziness: "auto"
        }
      }
    }
  }

  const { body: { hits } } = await esclient.search({
    from:  req.page  || 0,
    size:  req.limit || 100,
    index: index,
    type:  type,
    body:  query
  });

  const results = hits.total.value;
  const values  = hits.hits.map((hit) => {
    return {
      id:     hit._id,
      quote:  hit._source.quote,
      author: hit._source.author,
      score:  hit._score
    }
  });

  return {
    results,
    values
  }
}
As you can see, we’re composing our ElasticSearch query by selecting every quote that includes a given word or phrase.
Then, we spawn the query, setting both page and limit values we can pass them in a query string, for instance http://localhost:3000/quotes?text=love&page=1&limit=100. If these values are not passed via querystring, we’ll fall back to their default values.
ElasticSearch returns an incredibly big amount of data, but we just need four things:
- Quote ID
- The quote itself
- Quote author
- Score
The score represents how close the quote is to our search term. Once we have these values, we return them with the total results number, which may be useful when paginating the results on the front end.
Now we need to create the last function for our model insertNewQuote:
async function insertNewQuote(quote, author) {
  return esclient.index({
    index,
    type,
    body: {
      quote,
      author
    }
  })
}
This function is really simple, we just post the quote and the author to our index and return the query result back to the controller.
Now the complete /src/server/models/index.js file should look like this:
const { esclient, index, type } = require("../../elastic");

async function getQuotes(req) {
  const query = {
    query: {
      match: {
        quote: {
          query: req.text,
          operator: "and",
          fuzziness: "auto"
        }
      }
    }
  }

  const { body: { hits } } = await esclient.search({
    from:  req.page  || 0,
    size:  req.limit || 100,
    index: index,
    type:  type,
    body:  query
  });

  const results = hits.total.value;

  const values  = hits.hits.map((hit) => {
    return {
      id:     hit._id,
      quote:  hit._source.quote,
      author: hit._source.author,
      score:  hit._score
    }
  });

  return {
    results,
    values
  }
}

async function insertNewQuote(quote, author) {
  return esclient.index({
    index,
    type,
    body: {
      quote,
      author
    }
  })
}

module.exports = {
  getQuotes,
  insertNewQuote
}
And we’re done! We just need to setup our start script inside out package.json file and we’re ready to go:
"scripts": {
  "start": "pm2-runtime start ./src/main.js --name node_app",
  "stop": "pm2-runtime stop node_app "
}
We also need to update our /src/main.js script in order to start up our Express.js server once ElasticSearch has been connected:
const elastic = require("./elastic");
const server  = require("./server");
const data    = require("./data");
                require("dotenv").config();

(async function main() {
  const isElasticReady = await elastic.checkConnection();

  if (isElasticReady) {
    const elasticIndex = await elastic.esclient.indices.exists({index: elastic.index});

    if (!elasticIndex.body) {
      await elastic.createIndex(elastic.index);
      await elastic.setQuotesMapping();
      await data.populateDatabase()
    }

    server.start();
  }
})();
Launching the application
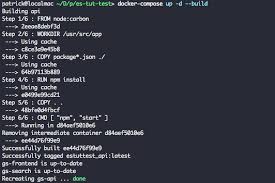
We’re now ready to start our application using docker-compose!
Just run the following command:
docker-compose up
You’ll need to wait until Docker downloads both the ElasticSearch and Node.js images, then it will boot up your server and you’ll be ready to query against your REST endpoints!
Let’s test with a couple of cURL calls:
curl localhost:3000/quotes?text=love&limit=3

{
  "success": true,
  "data": {
    "results": 716,
    "values": [
      {
        "id": "JDE3kGwBuLHMiUvv1itT",
        "quote": "There is only one happiness in life, to love and be loved.",
        "author": "George Sand",
        "score": 6.7102118
      },
      {
        "id": "JjE3kGwBuLHMiUvv1itT",
        "quote": "Live through feeling and you will live through love. For feeling is the language of the soul, and feeling is truth.",
        "author": "Matt Zotti",
        "score": 6.2868223
      },
      {
        "id": "NTE3kGwBuLHMiUvv1iFO",
        "quote": "Genuine love should first be directed at oneself if we do not love ourselves, how can we love others?",
        "author": "Dalai Lama",
        "score": 5.236455
      }
    ]
  }
}
So as you can see, we decided to limit our results to 3, but there are over 713 quotes!
We can easily get the next three quotes by calling:
curl localhost:3000/quotes?text=love&limit=3&page=2

{
  "success": true,
  "data": {
    "results": 716,
    "values": [
      {
        "id": "SsyHkGwBrOFNsaVmePwE",
        "quote": "Forgiveness is choosing to love. It is the first skill of self-giving love.",
        "author": "Mohandas Gandhi",
        "score": 4.93597
      },
      {
        "id": "rDE3kGwBuLHMiUvv1idS",
        "quote": "Neither a lofty degree of intelligence nor imagination nor both together go to the making of genius. Love, love, love, that is the soul of genius.",
        "author": "Wolfgang Amadeus Mozart",
        "score": 4.7821507
      },
      {
        "id": "TjE3kGwBuLHMiUvv1h9K",
        "quote": "Speak low, if you speak love.",
        "author": "William Shakespeare",
        "score": 4.6697206
      }
    ]
  }
}
And what if you need to insert a new quote? Just call the /quotes/new endpoint!
curl --request POST \
     --url http://localhost:3000/quotes/new \
     --header 'content-type: application/json' \
     --data '{
        "author": "Michele Riva",
        "quote": "Using Docker and ElasticSearch is challenging, but totally worth it."
}'
and the response will be:
{
  "success": true,
  "data": {
    "id": "is2QkGwBrOFNsaVmFAi8",
    "author": "Michele Riva",
    "quote": "Using Docker and ElasticSearch is challenging, but totally worth it."
  }
}
Conclusion
Docker makes it incredibly easy to manage our dependencies and their deployment. From that point, we could host our application on Heroku, AWS ECS, Google Cloud Container or any other Docker-based service with ease, without struggling to setup our server with their super-complex configurations.
Next steps?
- Learn how to use Kubernetes in order to scale your container and orchestrate more ElasticSearch Instances!
- Create a new endpoint that will allow you to update an existing quote. Mistakes can happen!
- And what about deleting a quote? How would you implement that endpoint?
- It would be great to save your quotes with tags (for instances, quotes about love, health, art)… try to update your
quotesindex!
Software development is fun. With Docker, Node, and ElasticSearch it’s even better!
Plug: LogRocket, a DVR for web apps

LogRocket is a frontend logging tool that lets you replay problems as if they happened in your own browser. Instead of guessing why errors happen, or asking users for screenshots and log dumps, LogRocket lets you replay the session to quickly understand what went wrong. It works perfectly with any app, regardless of framework, and has plugins to log additional context from Redux, Vuex, and @ngrx/store.
In addition to logging Redux actions and state, LogRocket records console logs, JavaScript errors, stacktraces, network requests/responses with headers + bodies, browser metadata, and custom logs. It also instruments the DOM to record the HTML and CSS on the page, recreating pixel-perfect videos of even the most complex single-page apps.