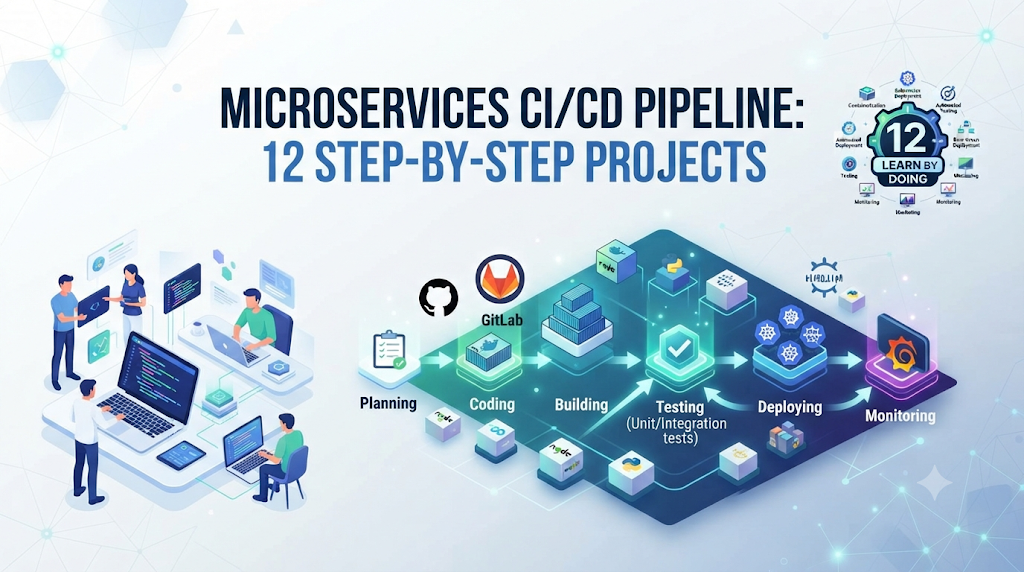
Introduction: Learn CI/CD Through Microservices Projects
Delivering software in a microservices architecture requires treating every service as an autonomous product with its own build lifecycle, automated testing gates, container image, and release pipeline—rather than bundling everything into a fragile, monolithic deployment. Hands-on projects bridge the gap between abstract DevOps theory and real-world distributed delivery by teaching you how to isolate repository triggers, validate API contracts, manage container registries, and coordinate zero-downtime releases safely. For learners building practical DevOps and CI/CD capabilities, educational resources like DevOpsSchool offer structured paths that pair well with self-paced lab work. Across the 12 progressive projects in this guide, you will start by building a three-service e-commerce application locally and advance step by step through Git workflows, independent CI pipelines, Docker containerization, contract testing, Docker Compose, Kubernetes deployments, security scanning, and automated rollbacks.
Before Starting: Understand the Learning Environment
Before writing pipeline configurations, set up a clean local workspace and verify that you understand the foundational building blocks used throughout these projects.
Core Knowledge Prerequisites
- Programming and REST APIs: Comfort reading and writing basic HTTP servers (using Python, Node.js, or Go) that exchange JSON payloads over standard HTTP methods (
GET,POST). - Git and Repository Management: Familiarity with cloning repositories, creating feature branches, committing changes, and opening pull requests.
- Linux Command-Line Fundamentals: Ability to navigate directories, inspect running processes, manage environment variables, and execute shell scripts.
- Docker and Container Basics: Understanding the difference between a Dockerfile, an image, and a running container, as well as port mapping and container networking.
- CI/CD Fundamentals: Knowing what triggers a pipeline, how runner agents execute jobs, and why pipelines fail fast on errors.
- Basic Networking: Understanding how services locate one another using hostnames, ports, and DNS resolution rather than hardcoded IP addresses.
- Kubernetes Fundamentals: Basic awareness of pods, deployments, services, and declarative YAML manifests (required from Project 8 onward).
Essential Lab Tools
- Git Hosting & CI Runner (GitHub & GitHub Actions, or Jenkins): Hosts source code and executes automated YAML-defined workflows on every push or pull request.
- Docker Engine & Docker Compose: Packages applications into portable containers and orchestrates multi-container networks on your local machine.
- Container Registry (Docker Hub or GitHub Container Registry): Stores versioned container images so deployment environments can pull verified artifacts.
- Local Kubernetes Cluster (Minikube or Kind): Provides a lightweight, single-node Kubernetes environment on your workstation for practicing deployments without cloud infrastructure costs.
Project 1: Build Your First Small Microservices Application
The Delivery Challenge
Before automating delivery, you need a working distributed system. Many beginners start CI/CD tutorials with a single “Hello World” script, which fails to demonstrate cross-service dependencies, port conflicts, or environment configuration.
Implementation Approach
Create a lightweight e-commerce backend composed of three independent Python (FastAPI or Flask) services:
user-service(Port8001): Manages user profiles and validates whether a user exists.product-service(Port8002): Maintains the product catalog and checks item availability.order-service(Port8003): Accepts new orders by callinguser-serviceandproduct-serviceover HTTP to verify the customer and product before confirming the order.
Organize your initial workspace cleanly:
Plaintext
microservices-lab/
├── user-service/
│   ├── app.py
│   ├── requirements.txt
│   └── config.env
├── product-service/
│   ├── app.py
│   ├── requirements.txt
│   └── config.env
└── order-service/
    ├── app.py
    ├── requirements.txt
    └── config.env
Each service exposes clear REST endpoints:
user-service:GET /healthandGET /users/{user_id}product-service:GET /healthandGET /products/{product_id}order-service:GET /healthandPOST /orders
In order-service/app.py, read the upstream service URLs from environment variables rather than hardcoding localhost:
Python
import os
import requests
from fastapi import FastAPI, HTTPException

app = FastAPI()

USER_SERVICE_URL = os.getenv("USER_SERVICE_URL", "http://localhost:8001")
PRODUCT_SERVICE_URL = os.getenv("PRODUCT_SERVICE_URL", "http://localhost:8002")

@app.get("/health")
def health():
    return {"status": "healthy", "service": "order-service"}

@app.post("/orders")
def create_order(user_id: int, product_id: int):
    user_resp = requests.get(f"{USER_SERVICE_URL}/users/{user_id}", timeout=3)
    if user_resp.status_code != 200:
        raise HTTPException(status_code=400, detail="Invalid user")

    prod_resp = requests.get(f"{PRODUCT_SERVICE_URL}/products/{product_id}", timeout=3)
    if prod_resp.status_code != 200:
        raise HTTPException(status_code=400, detail="Product unavailable")

    return {
        "order_id": 5001,
        "user": user_resp.json(),
        "product": prod_resp.json(),
        "status": "confirmed"
    }
Code language: JavaScript (javascript)
Local Execution and Verification
Open three separate terminal tabs, install dependencies (pip install -r requirements.txt), and launch each service on its designated port:
Bash
# Terminal 1
uvicorn app:app --host 0.0.0.0 --port 8001

# Terminal 2
uvicorn app:app --host 0.0.0.0 --port 8002

# Terminal 3
uvicorn app:app --host 0.0.0.0 --port 8003
Code language: CSS (css)
Test cross-service communication using curl:
Bash
curl -X POST "http://localhost:8003/orders?user_id=1&product_id=101"
Code language: JavaScript (javascript)
Expected Outcome: You receive a 200 OK JSON response combining user details from port 8001 and product details from port 8002. If you stop product-service, order-service returns an error, proving the runtime dependency.
Learning Outcome: You understand how to decompose business logic into isolated services that communicate through network APIs and rely on externalized configuration.
Project 2: Create Separate Git Repositories and Build Workflows
The Delivery Challenge
When all three services live in one folder without clear boundaries, a single documentation typo in user-service can accidentally trigger rebuilds and deployments across product-service and order-service.
Implementation Approach
Teams typically choose between two repository architectures:
| Factor | Polyrepo (One Repo per Service) | Monorepo (Single Shared Repo) |
| Isolation | Strict access control and completely separate commit histories. | Shared history; requires path-based CI filters. |
| Pipeline Triggers | Any push triggers that specific service’s pipeline. | Triggers only when files inside service-name/** change. |
| Cross-Service Changes | Requires separate pull requests across multiple repositories. | Atomic pull requests can update multiple services at once. |
| Best For | Autonomous teams practicing strict independent delivery. | Small teams or tightly coupled early-stage learning labs. |
For this learning journey, split the services into three separate Git repositories (user-service, product-service, and order-service)—or configure strict path-filtered workflows if keeping them in one repository.
Adopt a clean trunk-based branching strategy:
mainbranch: Always deployable; protected against direct pushes.- Feature branches (
feat/add-user-email,fix/order-timeout): Created frommainfor every change. - Commit practices: Use clear, scoped commit messages (e.g.,
feat(product): add stock count field). - Pull Requests (PRs): Require automated CI status checks to pass before merging into
main.
Create .github/workflows/ci.yml inside product-service to trigger automatically on pull requests and pushes to main:
YAML
name: Product Service Trigger Check

on:
  push:
    branches: [ main ]
  pull_request:
    branches: [ main ]

jobs:
  verify-trigger:
    runs-on: ubuntu-latest
    steps:
      - name: Checkout Product Service Code
        uses: actions/checkout@v4
      - name: Confirm Service Context
        run: echo "Running pipeline exclusively for product-service on commit $GITHUB_SHA"
Code language: PHP (php)
Verification and Expected Outcome
Push a commit to a feature branch in product-service and open a pull request. Observe that only the product-service workflow starts, while user-service and order-service remain completely idle.
Learning Outcome: You understand how source code organization and repository triggers enforce boundaries between services.
Project 3: Build Independent CI Pipelines for Each Service
The Delivery Challenge
A basic trigger check confirms that a pipeline starts, but it does not prove the code is safe to deploy. Without automated quality gates, broken syntax, missing dependencies, or failing logic can slip into main.
Implementation Approach
Build a dedicated microservices CI/CD pipeline inside each repository (user-service, product-service, and order-service). Each pipeline must execute a consistent sequence of verification stages:
- Checkout Source Code: Fetch the exact commit under test.
- Setup Runtime & Install Dependencies: Cache and install exact package versions from
requirements.txt. - Code Quality & Linting: Run
flake8orruffto enforce formatting and catch syntax bugs early. - Unit Testing: Execute
pytestto verify isolated business logic. - Artifact Generation: Package build metadata or test reports for auditability.
Here is a complete CI workflow for order-service (.github/workflows/ci.yml):
YAML
name: Order Service CI

on:
  push:
    branches: [ main ]
  pull_request:
    branches: [ main ]

jobs:
  build-and-test:
    runs-on: ubuntu-latest
    steps:
      - name: Checkout repository
        uses: actions/checkout@v4

      - name: Set up Python
        uses: actions/setup-python@v5
        with:
          python-version: "3.11"
          cache: "pip"

      - name: Install dependencies
        run: |
          python -m pip install --upgrade pip
          pip install -r requirements.txt pytest flake8

      - name: Run linter for code quality
        run: flake8 . --max-line-length=100

      - name: Run unit tests
        run: pytest tests/unit --junitxml=test-results.xml

      - name: Upload test report artifact
        if: always()
        uses: actions/upload-artifact@v4
        with:
          name: order-service-test-report
          path: test-results.xml
Code language: JavaScript (javascript)
Replicate this exact structure inside user-service and product-service. Because each service owns its pipeline, a team modifying user-service waits 45 seconds for its tests to finish rather than waiting 15 minutes for a massive shared test suite.
Verification and Expected Outcome
Intentionally introduce a linting error or a failing assertion in order-service and push the branch. Verify that the pipeline stops at the failing step, marks the pull request red, and attaches test-results.xml for debugging.
Learning Outcome: You can construct self-contained CI pipelines that validate code quality and unit logic independently for every service.
Project 4: Containerize Each Microservice With Docker
The Delivery Challenge
Code that passes CI on an Ubuntu runner can still fail on another developer’s laptop or a server due to Python version mismatches, missing OS libraries, or conflicting ports.
Implementation Approach
Package each microservice into an immutable Docker container image. A well-crafted Dockerfile uses a slim base image, separates dependency installation from application code to maximize layer caching, and runs as a non-root user for security.
Create a Dockerfile in user-service/, product-service/, and order-service/. Below is the standardized Dockerfile for order-service (adjust the port to 8001 for user-service and 8002 for product-service):
Dockerfile
FROM python:3.11-slim

WORKDIR /app

# Install dependencies first to leverage Docker layer caching
COPY requirements.txt .
RUN pip install --no-cache-dir -r requirements.txt

# Copy application source code
COPY . .

# Create a non-root user for security
RUN useradd -m appuser && chown -R appuser /app
USER appuser

EXPOSE 8003

ENV PYTHONUNBUFFERED=1

CMD ["uvicorn", "app:app", "--host", "0.0.0.0", "--port", "8003"]
Code language: PHP (php)
Build and tag each image locally using consistent naming conventions:
Bash
docker build -t devopsschool-lab/user-service:1.0.0 ./user-service
docker build -t devopsschool-lab/product-service:1.0.0 ./product-service
docker build -t devopsschool-lab/order-service:1.0.0 ./order-service
Run the containers and pass environment variables dynamically:
Bash
docker run -d --name user-svc -p 8001:8001 devopsschool-lab/user-service:1.0.0
docker run -d --name product-svc -p 8002:8002 devopsschool-lab/product-service:1.0.0
docker run -d --name order-svc -p 8003:8003 \
  -e USER_SERVICE_URL="http://host.docker.internal:8001" \
  -e PRODUCT_SERVICE_URL="http://host.docker.internal:8002" \
  devopsschool-lab/order-service:1.0.0
Code language: JavaScript (javascript)
Verification and Expected Outcome
Run docker ps to confirm all three containers are running, then send a POST request to http://localhost:8003/orders?user_id=1&product_id=101. Clean up afterward with docker rm -f user-svc product-svc order-svc.
Learning Outcome: You can package each microservice with its runtime dependencies into portable, consistently tagged container images.
Project 5: Add Automated Testing for Service Communication
The Delivery Challenge
Unit tests mock external dependencies, which means order-service can pass 100% of its unit tests even if product-service renames "price" to "unit_price" or returns a 500 error.
Implementation Approach
Implement a layered automated microservices testing strategy inside your CI pipelines:
- Unit Tests: Test isolated functions inside a single service with mocked HTTP calls.
- API Tests: Spin up the service and verify HTTP status codes, headers, and payload validation rules.
- Contract Tests: Verify that the response schema produced by
product-servicematches the exact structure expected byorder-service. - Integration Tests: Run
order-serviceagainst real or containerized instances ofuser-serviceandproduct-serviceusing controlled test data.
Create tests/test_order_integration.py inside order-service using pytest and responses (or httpx mock transports) to validate both normal communication and failure handling:
Python
import pytest
from fastapi.testclient import TestClient
import responses
from app import app

client = TestClient(app)

@responses.activate
def test_create_order_success():
    # Simulate expected contracts from upstream services
    responses.add(
        responses.GET,
        "http://localhost:8001/users/1",
        json={"id": 1, "name": "Asha", "active": True},
        status=200
    )
    responses.add(
        responses.GET,
        "http://localhost:8002/products/101",
        json={"id": 101, "title": "Mechanical Keyboard", "price": 85.0},
        status=200
    )

    response = client.post("/orders?user_id=1&product_id=101")
    assert response.status_code == 200
    body = response.json()
    assert body["status"] == "confirmed"
    assert body["product"]["price"] == 85.0

@responses.activate
def test_create_order_handles_product_service_outage():
    responses.add(
        responses.GET,
        "http://localhost:8001/users/1",
        json={"id": 1, "name": "Asha"},
        status=200
    )
    # Simulate product-service returning 503 Service Unavailable
    responses.add(
        responses.GET,
        "http://localhost:8002/products/101",
        status=503
    )

    response = client.post("/orders?user_id=1&product_id=101")
    assert response.status_code == 400
    assert response.json()["detail"] == "Product unavailable"
Code language: PHP (php)
Add a JSON schema validation check to verify API contracts. If product-service removes the price key in a future commit, the contract test fails immediately in CI before the image is built.
Verification and Expected Outcome
Run pytest -v in CI. Temporarily change the mocked response key in test_create_order_success from "price" to "cost" and observe how the pipeline flags the contract mismatch immediately.
Learning Outcome: You can design automated tests that catch broken API contracts and upstream service failures before code reaches deployment environments.
Project 6: Publish Service Images to a Container Registry
The Delivery Challenge
Building a Docker image inside a temporary CI runner is useless if the image disappears as soon as the runner shuts down. Deployment environments need a central, secure place to pull verified images.
Implementation Approach
Integrate a container registry (such as GitHub Container Registry ghcr.io or Docker Hub) into your CI workflow. Follow strict tagging discipline:
- Never rely solely on
:latest: Overwriting:latestmakes it impossible to know which commit is running in a cluster or to roll back cleanly. - Use immutable commit SHA tags: Tag every build with its Git commit hash (e.g.,
ghcr.io/your-org/order-service:sha-a1b2c3d) so every running container traces directly back to exact source code. - Authenticate securely: Store registry tokens in CI encrypted secrets (
GITHUB_TOKENor repository secrets), never insideDockerfileor workflow YAML files.
Update .github/workflows/ci.yml in order-service to build and push the image only after tests pass on the main branch:
YAML
  build-and-push:
    needs: build-and-test
    if: github.ref == 'refs/heads/main'
    runs-on: ubuntu-latest
    permissions:
      contents: read
      packages: write

    steps:
      - name: Checkout code
        uses: actions/checkout@v4

      - name: Log in to GitHub Container Registry
        uses: docker/login-action@v3
        with:
          registry: ghcr.io
          username: ${{ github.actor }}
          password: ${{ secrets.GITHUB_TOKEN }}

      - name: Extract short commit SHA
        id: vars
        run: echo "sha_short=$(git rev-parse --short HEAD)" >> $GITHUB_OUTPUT

      - name: Build and push Docker image
        uses: docker/build-push-action@v5
        with:
          context: .
          push: true
          tags: |
            ghcr.io/${{ github.repository_owner }}/order-service:sha-${{ steps.vars.outputs.sha_short }}
            ghcr.io/${{ github.repository_owner }}/order-service:latest
Reuse this exact job template across user-service and product-service, changing only the image repository name.
Verification and Expected Outcome
Merge a pull request into main. Confirm the build-and-push job succeeds and verify that you can pull the tagged image locally using docker pull ghcr.io/<your-username>/order-service:sha-<commit>.
Learning Outcome: You know how to automate secure image authentication, immutable commit-based tagging, and artifact publishing in CI.
Project 7: Run Multiple Microservices With Docker Compose
The Delivery Challenge
Running long docker run commands with manual port flags and host.docker.internal workarounds becomes error-prone as soon as you add databases, health checks, or additional services.
Implementation Approach
Use Docker Compose to define the entire multi-service system in a single declarative compose.yaml file. Docker Compose automatically provisions an isolated bridge network where containers discover one another using service names (http://user-service:8001 and http://product-service:8002).
Create compose.yaml in your root lab directory:
YAML
services:
  user-service:
    build: ./user-service
    image: devopsschool-lab/user-service:1.0.0
    ports:
      - "8001:8001"
    healthcheck:
      test: ["CMD", "python", "-c", "import urllib.request; urllib.request.urlopen('http://localhost:8001/health')"]
      interval: 10s
      timeout: 3s
      retries: 3
    networks:
      - microservices-net

  product-service:
    build: ./product-service
    image: devopsschool-lab/product-service:1.0.0
    ports:
      - "8002:8002"
    volumes:
      - product-data:/app/data
    healthcheck:
      test: ["CMD", "python", "-c", "import urllib.request; urllib.request.urlopen('http://localhost:8002/health')"]
      interval: 10s
      timeout: 3s
      retries: 3
    networks:
      - microservices-net

  order-service:
    build: ./order-service
    image: devopsschool-lab/order-service:1.0.0
    ports:
      - "8003:8003"
    environment:
      - USER_SERVICE_URL=http://user-service:8001
      - PRODUCT_SERVICE_URL=http://product-service:8002
    depends_on:
      user-service:
        condition: service_healthy
      product-service:
        condition: service_healthy
    networks:
      - microservices-net

volumes:
  product-data:

networks:
  microservices-net:
    driver: bridge
Code language: JavaScript (javascript)
Notice how depends_on paired with condition: service_healthy prevents order-service from accepting traffic before its upstream dependencies pass their /health checks.
Execution, Inspection, and Cleanup
Start the environment in detached mode and inspect its status:
Bash
docker compose up -d --build
docker compose ps
docker compose logs -f order-service
Send a test order request to http://localhost:8003/orders?user_id=1&product_id=101, then tear down the stack cleanly:
Bash
docker compose down
Learning Outcome: You understand how service discovery, container networking, health checks, and persistent volumes coordinate multi-service applications locally.
Project 8: Deploy Microservices to Kubernetes
The Delivery Challenge
Docker Compose works well on a single workstation, but it cannot automatically reschedule crashed containers across multiple nodes, perform zero-downtime rolling updates, or manage cluster-wide configuration cleanly.
Implementation Approach
Transition your lab to a local Kubernetes cluster (using Minikube or Kind) to practice Docker and Kubernetes CI/CD patterns. Structure your Kubernetes resources cleanly:
- Namespace (
microservices-dev): Isolates your lab resources from system workloads. - ConfigMap (
order-service-config): Stores non-sensitive environment variables likeUSER_SERVICE_URL. - Secret (
app-secrets): Stores sensitive API keys or credentials. - Deployment: Manages replica pods, resource requests/limits, liveness/readiness probes, and rolling update strategies.
- Service (
ClusterIP): Provides a stable internal DNS name (user-service,product-service) so pods can communicate regardless of pod restarts or IP changes.
Create k8s/order-service.yaml as a representative manifest for your learning cluster:
YAML
apiVersion: v1
kind: Namespace
metadata:
  name: microservices-dev
---
apiVersion: v1
kind: ConfigMap
metadata:
  name: order-service-config
  namespace: microservices-dev
data:
  USER_SERVICE_URL: "http://user-service:8001"
  PRODUCT_SERVICE_URL: "http://product-service:8002"
---
apiVersion: apps/v1
kind: Deployment
metadata:
  name: order-service
  namespace: microservices-dev
spec:
  replicas: 2
  selector:
    matchLabels:
      app: order-service
  template:
    metadata:
      labels:
        app: order-service
    spec:
      containers:
        - name: order-service
          image: ghcr.io/your-org/order-service:sha-a1b2c3d
          ports:
            - containerPort: 8003
          envFrom:
            - configMapRef:
                name: order-service-config
          resources:
            requests:
              cpu: "100m"
              memory: "128Mi"
            limits:
              cpu: "250m"
              memory: "256Mi"
          readinessProbe:
            httpGet:
              path: /health
              port: 8003
            initialDelaySeconds: 5
            periodSeconds: 10
          livenessProbe:
            httpGet:
              path: /health
              port: 8003
            initialDelaySeconds: 15
            periodSeconds: 20
---
apiVersion: v1
kind: Service
metadata:
  name: order-service
  namespace: microservices-dev
spec:
  type: ClusterIP
  selector:
    app: order-service
  ports:
    - port: 8003
      targetPort: 8003
Create matching Deployment and Service definitions for user-service (8001) and product-service (8002). Note that in a production architecture, you would add an Ingress controller, external secret managers, and horizontal pod autoscalers, whereas ClusterIP with port-forwarding keeps your learning lab straightforward.
Verification and Expected Outcome
Apply the manifests and verify that pods become ready:
Bash
kubectl apply -f k8s/
kubectl get pods -n microservices-dev
kubectl port-forward svc/order-service 8003:8003 -n microservices-dev
Code language: JavaScript (javascript)
Test POST http://localhost:8003/orders?user_id=1&product_id=101 while port-forwarding is active.
Learning Outcome: You can translate containerized services into declarative Kubernetes workloads with health probes, resource boundaries, and internal DNS discovery.
Project 9: Automate Deployment With a CI/CD Pipeline
The Delivery Challenge
Manually editing YAML files and running kubectl apply from your laptop creates configuration drift and risks deploying untested or mistagged images.
Implementation Approach
Extend your CI pipeline into a complete microservices deployment automation workflow. Establish clear environment separation using Kubernetes namespaces (microservices-dev and microservices-staging):
- Development (
microservices-dev): Automatically updates whenever a commit merges tomain. - Staging (
microservices-staging): Requires a manual approval gate in GitHub Actions (or Jenkins) before promotion. - Image Version Selection: Pass the exact
sha-<commit>tag generated in the build job directly intokubectl set imageso untested:latestimages are never deployed. - Deployment Verification & Rollback: Run
kubectl rollout statuswith a timeout; if new pods fail readiness probes, triggerkubectl rollout undoautomatically.
Add the deployment stage to .github/workflows/ci.yml in order-service:
YAML
  deploy-dev:
    needs: build-and-push
    runs-on: ubuntu-latest
    environment: development
    steps:
      - name: Configure kubeconfig
        uses: azure/k8s-set-context@v4
        with:
          method: kubeconfig
          kubeconfig: ${{ secrets.KUBE_CONFIG_DEV }}

      - name: Update Kubernetes Deployment Image
        run: |
          SHORT_SHA=$(echo "${{ github.sha }}" | cut -c1-7)
          IMAGE="ghcr.io/${{ github.repository_owner }}/order-service:sha-${SHORT_SHA}"
          kubectl set image deployment/order-service order-service=${IMAGE} -n microservices-dev

      - name: Verify Rollout Health
        run: |
          if ! kubectl rollout status deployment/order-service -n microservices-dev --timeout=90s; then
            echo "Deployment failed readiness checks. Rolling back..."
            kubectl rollout undo deployment/order-service -n microservices-dev
            exit 1
          fi
Verification and Expected Outcome
Push a valid change to order-service on main. Watch the pipeline build the image, push the sha- tag, update the order-service deployment in microservices-dev, and confirm rollout completion without touching user-service or product-service.
Learning Outcome: You can automate safe, verified Kubernetes deployments with strict image traceability and automated rollback protection.
Project 10: Handle Service Dependencies and Coordinated Releases
The Delivery Challenge
Even in well-designed architectures, services occasionally require coordinated changes. Suppose order-service needs to display a new discount_percentage field from product-service. If you deploy order-service first, it crashes when discount_percentage is missing; if product-service replaces price with discounted_price abruptly, existing consumers break.
Implementation Approach
Avoid synchronized “big bang” releases by practicing backward-compatible evolution (often called the Expand and Contract pattern):
- Expand (
product-servicev1.1.0): Updateproduct-serviceto return both the existingpricefield and the newdiscount_percentagefield (defaulting to0). Deployproduct-serviceindependently. Existing consumers continue working without interruption. - Verify Contracts: Run contract tests confirming
product-servicev1.1.0 satisfies both old and new consumer expectations. - Migrate (
order-servicev1.1.0): Updateorder-serviceto readdiscount_percentagegracefully (falling back to0if absent). Deployorder-serviceindependently. - Contract (Cleanup): Only after all consumers migrate to the new field (or a versioned
/v2/productsendpoint) can deprecated fields be safely removed.
For database schema changes inside a service, follow the same rule: add new nullable columns first, deploy the application code that writes to both columns, backfill data, and drop old columns in a later release.
Verification and Expected Outcome
Deploy product-service with the additive discount_percentage field while keeping order-service on its previous version. Confirm zero downtime and zero errors in order-service before rolling out the order-service update.
Learning Outcome: You know how to decouple release schedules across dependent services using backward-compatible API design, versioning, and staged rollouts.
Project 11: Introduce Security and Monitoring Into the Pipeline
The Delivery Challenge
A fast pipeline that deploys vulnerable third-party libraries, leaks secrets in container layers, or leaves operators blind after deployment creates severe operational risk.
Implementation Approach
Embed security controls (“shift-left” checks) directly into CI and establish post-deployment observability in Kubernetes:
Where Security Checks Belong in the Pipeline
- Pre-Build (Dependency Scanning): Run
pip-auditor Trivy filesystem scans againstrequirements.txtto catch known CVEs before building images. - Post-Build / Pre-Push (Container Image Scanning): Scan the built Docker image with Trivy before pushing it to the registry; fail the pipeline on
CRITICALvulnerabilities. - Secret Management & Access Control: Never bake
.envfiles into Docker images. Inject runtime secrets via KubernetesSecretobjects and restrict CI deployment tokens using namespace-scoped Kubernetes RBAC roles. - Image Provenance: Generate a Software Bill of Materials (SBOM) or sign images with Cosign so clusters only run artifacts built by your trusted CI pipeline.
Add a Trivy container scan step right before pushing the image in Project 6:
YAML
      - name: Scan Docker image for vulnerabilities
        uses: aquasecurity/trivy-action@master
        with:
          image-ref: "ghcr.io/${{ github.repository_owner }}/order-service:sha-${{ steps.vars.outputs.sha_short }}"
          format: "table"
          exit-code: "1"
          ignore-unfixed: true
          severity: "CRITICAL"
Post-Deployment Observability
Once deployed to Kubernetes, combine three telemetry pillars to detect issues fast:
- Structured Application Logs: Output JSON logs containing
service_name,timestamp,level, andrequest_idso log aggregators can filter errors immediately. - Metrics and Monitoring: Expose
/metricsendpoints (using Prometheus client libraries) to track request latency, HTTP error rates (5xx), and pod CPU/memory saturation. - Distributed Tracing: Propagate a
X-Request-IDor OpenTelemetry trace header fromorder-servicetouser-serviceandproduct-serviceso you can pinpoint which downstream call slowed down an order. - Deployment Alerts: Configure alert rules to notify your team channel if error rates spike within 5 minutes of a deployment rollout.
Verification and Expected Outcome
Add an outdated, vulnerable package version to requirements.txt in a test branch and verify that Trivy blocks the image from being pushed to your registry.
Learning Outcome: You can secure container supply chains inside CI and monitor live microservice behavior after deployment.
Project 12: Complete Learning Challenge – Build an End-to-End Microservices CI/CD System
The Final Capstone Assignment
Combine everything you built in Projects 1 through 11 into a single, end-to-end automated system.
Project Requirements
- Develop Three Services: Build
user-service(8001),product-service(8002), andorder-service(8003) with/healthendpoints and structured JSON logging. - Organize Source Code: Store each service in Git with branch protection on
main. - Configure Independent CI Workflows: Ensure changes in one service trigger only its own pipeline.
- Automate Testing: Include unit tests and API contract tests in every pipeline.
- Containerize Services: Build slim, non-root Docker images for each service.
- Scan and Publish Images: Run a vulnerability scan and push
sha-<commit>tagged images to your container registry. - Deploy to Kubernetes: Automate rolling deployments into
microservices-devand gated deployments intomicroservices-staging. - Validate Communication: Execute a post-deployment smoke test verifying
POST /orderssucceeds across all three services. - Monitor Health: Inspect pod readiness, resource usage, and cross-service trace IDs in logs.
- Demonstrate Safe Rollback: Deploy a deliberately broken commit to
product-service(e.g., returning HTTP500on/health), verify that Kubernetes blocks the rollout, and executekubectl rollout undo deployment/product-service -n microservices-devto restore service health.
Evaluation Criteria and Common Mistakes to Avoid
| Evaluation Area | Success Criteria | Common Mistake to Avoid |
| Pipeline Isolation | Modifying user-service does not rebuild order-service. | Triggering all pipelines on every repository event. |
| Image Traceability | Every running pod uses an explicit sha-<commit> tag. | Deploying mutable :latest tags in Kubernetes manifests. |
| Configuration | Service URLs come from ConfigMaps/environment variables. | Hardcoding localhost inside application source code. |
| Resilience | Failing health checks halt rollouts before traffic drops. | Omitting readinessProbe in Kubernetes Deployment specs. |
Choosing the Right Project Difficulty
You do not need to finish all 12 projects in a single weekend. Progress through three structured stages, verifying each milestone before moving forward:
Stage 1: Beginner (Projects 1–4)
- Focus: Building basic REST microservices, organizing Git repositories, writing foundational CI lint/test workflows, and containerizing apps with Docker.
- Readiness Check Before Advancing: You can run all three containers locally and explain how
Dockerfilelayer caching works.
Stage 2: Intermediate (Projects 5–7)
- Focus: Writing API and contract tests, pushing commit-tagged images to a registry using encrypted CI secrets, and orchestrating multi-service stacks with Docker Compose.
- Readiness Check Before Advancing: You can break an API field in
product-serviceand watch your automated test suite catch it before a container image is published.
Stage 3: Advanced (Projects 8–12)
- Focus: Kubernetes manifests, automated rolling deployments, backward-compatible API evolution, container security scanning, observability, and rollbacks.
- Readiness Check Before Advancing: You can deploy an update to one service in Kubernetes, trace a request across all three pods, and roll back a faulty release cleanly.
Conclusion: Build Skills One Microservice at a Time
Mastering CI/CD for microservices comes down to mastering boundaries. When each service has its own clean repository structure, isolated test suite, immutable container image, and automated deployment verification, teams gain the confidence to release updates independently without risking system-wide outages. By working through these progressive projects, you move beyond abstract DevOps buzzwords into practical engineering habits: catching contract mismatches early, eliminating mutable :latest tags, separating configuration from code, and relying on health probes and automated rollbacks when failures occur. Start small with the three core services, validate every stage in your local lab, and gradually expand your pipeline with database persistence, automated canary rollouts, and deeper observability as your confidence grows.