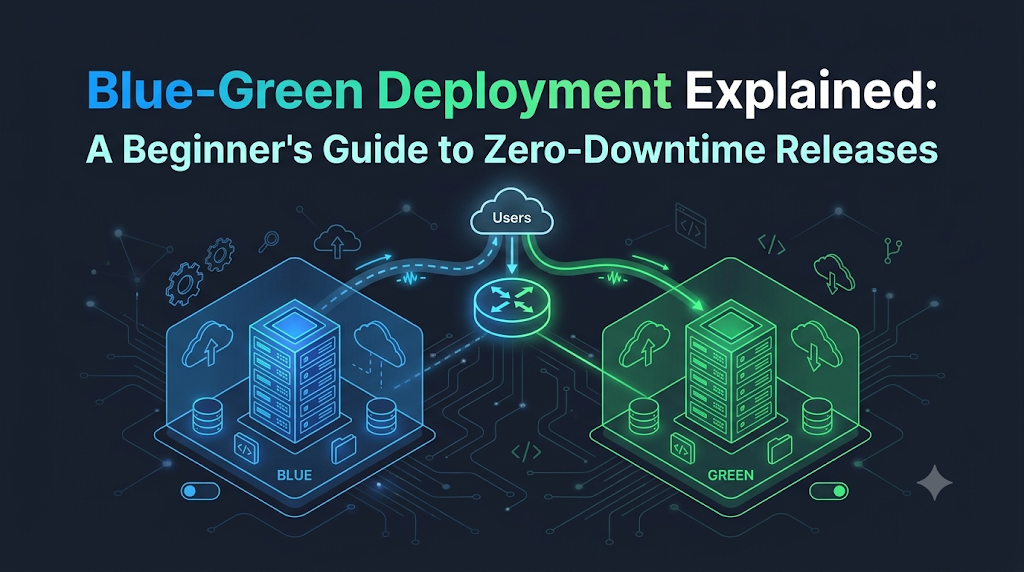
Imagine a busy coffee shop remodeling its ordering counter without turning away a single patron: rather than closing up shop for construction, the owners build an identical counter right next door, calibrate the espresso machines, test the card readers, and simply direct the next customer in line to the new register. Modern web applications require this exact continuity, as updating software directly on a live server introduces broken sessions, gateway errors, and costly downtime whenever things go wrong. Blue-Green Deployment solves this challenge by running two identical environments side by side—one actively serving users while the other readies the upcoming release—allowing teams to cut over traffic in an instant or roll back just as swiftly if an issue arises. For students and newcomers exploring modern release workflows on DevOpsSchool, grasping how this strategy decouples code installation from user impact is a foundational step toward mastering resilient cloud architecture.
Meet the Two Environments: Blue and Green
At its core, a Blue-Green Deployment strategy relies on two identical physical or virtual production environments running in parallel. By convention, one environment is designated Blue and the other is designated Green.
                           +------------------------+
                           |      User Traffic      |
                           +-----------+------------+
                                       |
                                       v
                           +------------------------+
                           |  Router / Load Balancer|
                           |   (e.g., NGINX / ALB)  |
                           +-----------+------------+
                                       |
                         [ Active Route to Live App ]
                                       |
                   +-------------------+-------------------+
                   |                                       |
                   v                                       v
         +-------------------+                   +-------------------+
         | BLUE ENVIRONMENT  |                   | GREEN ENVIRONMENT |
         |   (Live / v1.0)   |                   |  (Idle / v2.0)    |
         |                   |                   |                   |
         |  App Instances    |                   |  App Instances    |
         +---------+---------+                   +---------+---------+
                   |                                       |
                   +-------------------+-------------------+
                                       |
                                       v
                           +------------------------+
                           |  Shared Data Layer     |
                           |  (PostgreSQL / Redis)  |
                           +------------------------+
The Blue Environment (Currently Active)
The Blue environment hosts the current version of the live application (for example, Version 1.0). All incoming user requests, whether originating from web browsers, mobile apps, or external APIs, are routed directly to Blue. Blue handles your production workload, processes transactions, and maintains operational stability.
The Green Environment (The Staging Ground)
The Green environment is an exact replica of Blue in terms of operating system, system libraries, network topology, server capacity, and configuration. However, while Blue is serving live traffic, Green sits completely idle or serves only internal test requests. When your engineering team finishes building Version 2.0 of the software, they do not touch Blue. Instead, they deploy Version 2.0 directly to Green.
The Load Balancer or Traffic Router
Positioned in front of both environments sits a traffic director—typically a reverse proxy (such as NGINX or HAProxy), a cloud load balancer (such as an AWS Application Load Balancer or Google Cloud Load Balancer), or a Kubernetes Service/Ingress controller.
The router holds the routing rules that dictate where incoming traffic goes. During standard operations, 100% of external traffic is directed to Blue, while Green remains completely isolated from the public internet.
Shared Infrastructure and the Data Layer
While compute resources (web servers, container pods, microservices) are duplicated across Blue and Green, the data tier—relational databases, document stores, object storage, and cache clusters—is almost always shared between them.
Because both environments must access the same customer records, financial ledgers, and product catalogs, isolating databases completely is rarely feasible without complex continuous data replication.
This shared data model requires disciplined schema management, backward compatibility, and careful planning, which we will examine later in this guide.
Follow a Release From Start to Finish
To understand how Blue-Green Deployment works in real life, let us trace a complete release lifecycle for a hypothetical student portal application called CampusConnect.
Stage 1: Live on Blue
[ Traffic ] ----> [ Router ] ====> [ Blue (v1.0 - Active) ]
                                   [ Green (Empty / Idle) ]

Stage 2: Deploy to Green
[ Traffic ] ----> [ Router ] ====> [ Blue (v1.0 - Active) ]
                                   [ Green (v2.0 - Testing) ] <---- Internal QA

Stage 3: Traffic Switch
[ Traffic ] ----> [ Router ] ----  [ Blue (v1.0 - Standby) ]
                             \===> [ Green (v2.0 - Active) ]

Stage 4: Post-Release Standby
[ Traffic ] ----> [ Router ] ====> [ Green (v2.0 - Active) ]
                                   [ Blue (v1.0 - Rollback Safety Net) ]
Code language: PHP (php)
Step 1: Users Access the Active Blue Environment
At 09:00 AM, hundreds of students are logged into CampusConnect checking lecture schedules and submitting assignments. The router directs every request to the Blue environment running CampusConnect Release 1.0. The Green environment is inactive.
Step 2: Developers Prepare the New Application Version
The development team packages CampusConnect Release 2.0, which includes an updated dashboard and a revamped grade viewer. The automated CI/CD pipeline builds new container images, executes unit tests, and tags the artifact as ready for deployment.
Step 3: The New Version Is Deployed to Green
The release automation deploys Release 2.0 exclusively into the Green environment. The running Blue environment is not modified, restarted, or altered in any way. Students actively using CampusConnect on Blue experience zero performance degradation, zero dropped sessions, and zero interruptions.
Step 4: Automated Tests and Health Checks Are Performed
Before any student sees Release 2.0, the release engineering team runs synthetic transactions against Green. These include:
- Deep HTTP health checks verifying database connectivity.
- Automated integration test suites verifying authentication flows.
- Smoke tests ensuring that key assets and API responses render cleanly.
Step 5: Green Is Validated Before Receiving Traffic
Internal quality assurance (QA) engineers and product owners connect to Green using internal DNS records, specific HTTP host headers, or an administrative VPN. They manually verify that the user interface is responsive, the new features function as specified, and no unexpected errors show up in the logs.
Step 6: Traffic Is Switched From Blue to Green
Once the release meets all verification criteria, the release engineer or automated pipeline triggers the cutover. The load balancer configuration is updated to route all incoming public requests to Green instead of Blue.
Because modern load balancers swap targets instantaneously in memory, the cutover happens in milliseconds. When a student refreshes their browser page, their subsequent request is processed by CampusConnect Release 2.0 on Green.
Step 7: The Team Monitors the New Release
Immediately following the switch, real-time observability dashboards monitor error rates (such as HTTP 5xx responses), CPU utilization, memory consumption, latency, and database query throughput on Green.
Step 8: Blue Remains Available Temporarily for Rollback
The team does not destroy or wipe the Blue environment immediately. Blue remains idle and ready for a predetermined retention window (such as two to four hours). If an unexpected bug surfaces under heavy production load, the load balancer can instantly flip traffic back to Blue, restoring stable operations within seconds.
Why Do Development Teams Use This Deployment Strategy?
Every deployment pattern represents an engineering trade-off. Understanding both the operational benefits and the real-world constraints of Blue-Green releases helps you decide when to choose it over simpler alternatives.
Practical Advantages
- Elimination of Release Downtime: Because the application is fully started, configured, and warmed up in Green before serving public traffic, the downtime associated with process restarts and cache warming is eliminated.
- Instantaneous Rollback Mechanism: In an in-place deployment, rolling back a broken release requires reinstalling older packages, reverting configuration files, and restarting services, which can take twenty minutes to an hour. In a Blue-Green deployment, rollback is a simple load balancer redirect that completes in seconds.
- Realistic Pre-Production Validation: Traditional staging environments often drift away from production specifications. With Blue-Green, your pre-release validation occurs in an environment that is identical to production in capacity, network routes, and security policies.
- Isolated Testing of the New Version: Performance testing, security vulnerability scans, and exploratory functional tests can run directly against Green without impacting live customer transactions on Blue.
- Predictable and Repeatable Operations: The process of spinning up, validating, switching, and tearing down environments can be entirely standardized in code, removing human guesswork during release events.
Limitations and Practical Challenges
| Challenge Area | Description | Engineering Mitigation |
|---|---|---|
| Infrastructure Cost | Maintaining two duplicate, production-grade environments can double compute, network, and hosting expenses. | Ephemeral infrastructure: spin up Green on-demand via Infrastructure as Code (Terraform) and tear down Blue post-cutover. |
| Database Schema Compatibility | Both versions (v1.0 on Blue and v2.0 on Green) frequently need to talk to the exact same database during the transition. | Use the Expand/Contract (Parallel Run) migration pattern to keep schemas strictly backward-compatible. |
| Stateful Data & User Sessions | In-flight user sessions stored in local memory on Blue can be abruptly severed during the cutover. | Externalize user sessions into distributed in-memory stores like Redis or Memcached. |
| Configuration Drift | Operating system updates, patch levels, or environment variables applied to Blue might not be reflected on Green. | Manage environments strictly using declarative automation tools (Ansible, Docker, Kubernetes). |
Blue-Green vs Rolling vs Canary: Understanding the Differences
Beginners frequently confuse Blue-Green Deployment with two other popular release strategies: Rolling Deployments and Canary Deployments. Here is how to distinguish between them clearly.
Blue-Green Deployment:
All-at-once switch between two separate environments
[ Traffic ] ===> [ Blue (All Nodes) ]  --> Switch -->  [ Traffic ] ===> [ Green (All Nodes) ]

Rolling Deployment:
Incremental replacement of nodes within a single environment
Step 1: [ v1 ] [ v1 ] [ v1 ]
Step 2: [ v2 ] [ v1 ] [ v1 ]
Step 3: [ v2 ] [ v2 ] [ v1 ]
Step 4: [ v2 ] [ v2 ] [ v2 ]

Canary Deployment:
Small percentage of traffic routed to new version to test behavior
[ 95% Traffic ] ===> [ v1.0 (Stable Pool) ]
[  5% Traffic ] ===> [ v2.0 (Canary Node) ]
Code language: PHP (php)
Detailed Strategy Comparison
| Feature | Blue-Green Deployment | Rolling Deployment | Canary Deployment |
|---|---|---|---|
| Traffic Cutover | Instantaneous cutover (100% of traffic moves from Blue to Green at once). | Gradual shift as individual nodes or pods are replaced one by one. | Percentage-based traffic split (e.g., 95% to current version, 5% to canary). |
| Infrastructure Footprint | High (requires up to 2x capacity during the deployment window). | Low (operates within the existing cluster footprint). | Very low (requires only a small number of canary instances). |
| Rollback Complexity | Extremely simple and fast: redirect the router back to the old environment. | Moderate: requires rolling back instances one by one or redeploying the old revision. | Simple: set the canary traffic weight to 0% if errors occur. |
| Simultaneous Versions | Only one version serves public traffic at any given moment. | Both versions run side-by-side and serve live users during the transition window. | Both versions run side-by-side and serve live users continuously. |
| Blast Radius of Bugs | High: if a bug escapes pre-release testing, all users hit it immediately after the switch. | Medium: only users hitting the updated nodes encounter the bug. | Minimal: only the small fraction of users routed to the canary are exposed. |
| Best Used For | Critical applications needing clean cutovers and rapid rollbacks with sufficient infrastructure budgets. | Resource-constrained clusters, microservices with high horizontal node counts. | High-traffic web platforms testing production user behavior, performance, and stability. |
Your First Blue-Green Deployment Lab
The best way to understand how traffic switches between environments is to build a working prototype on your own computer. In this hands-on lab, we will build, run, and manage a complete Blue-Green architecture using Docker and NGINX.
[ Developer Workstation: Localhost:8080 ]
                  |
                  v
       +--------------------+
       | NGINX Reverse      |
       | Proxy (Port 8080)  |
       +---------+----------+
                 |
        [ proxy_pass rule ]
                 |
     +-----------+-----------+
     |                       |
     v                       v
+----------------+     +----------------+
| Blue Container |     | Green Container|
|  (Port 8081)   |     |  (Port 8082)   |
|  CampusConnect |     |  CampusConnect |
|  Release 1.0   |     |  Release 2.0   |
+----------------+     +----------------+
Code language: JavaScript (javascript)
Lab Prerequisites
Before starting, ensure you have the following tools installed and working on your local system (Linux, macOS, or Windows with WSL2):
- Terminal / Shell Access: A basic working familiarity with command-line commands (
cd,mkdir,curl,cat). - Docker Engine & Docker CLI: Docker installed and running locally. Verify your installation by running
docker --version. - HTTP Client: A command-line tool like
curlor a web browser to test HTTP responses. - Network Ports: Ensure local ports
8080,8081, and8082are unreserved and open on your machine.
Hands-On Exercise: Run Blue and Green Applications
Let us build two simple, lightweight web application versions using standard NGINX base images serving static HTML responses.
Step 1: Create a Clean Project Directory Structure
Open your terminal and create a dedicated workspace for the project:
Bash
mkdir -p blue-green-lab/blue blue-green-lab/green blue-green-lab/nginx
cd blue-green-lab
Step 2: Create the Blue Application (Version 1.0)
Create an HTML file for the Blue environment:
Bash
cat << 'EOF' > blue/index.html
<!DOCTYPE html>
<html>
<head>
  <title>CampusConnect - Version 1.0</title>
  <style>
    body { font-family: sans-serif; background-color: #e6f2ff; text-align: center; padding-top: 50px; }
    h1 { color: #004085; font-size: 2.5rem; }
    .badge { background: #004085; color: white; padding: 8px 16px; border-radius: 4px; font-weight: bold; }
  </style>
</head>
<body>
  <h1>CampusConnect Portal</h1>
  <p><span class="badge">ENVIRONMENT: BLUE (v1.0)</span></p>
  <p>Status: All student services operational.</p>
</body>
</html>
EOF
Code language: JavaScript (javascript)
Create a simple Dockerfile inside the blue/ directory:
Bash
cat << 'EOF' > blue/Dockerfile
FROM nginx:alpine
COPY index.html /usr/share/nginx/html/index.html
EXPOSE 80
EOF
Code language: JavaScript (javascript)
Step 3: Create the Green Application (Version 2.0)
Now, create the upgraded version of our application inside the green/ directory:
Bash
cat << 'EOF' > green/index.html
<!DOCTYPE html>
<html>
<head>
  <title>CampusConnect - Version 2.0</title>
  <style>
    body { font-family: sans-serif; background-color: #e6ffed; text-align: center; padding-top: 50px; }
    h1 { color: #155724; font-size: 2.5rem; }
    .badge { background: #155724; color: white; padding: 8px 16px; border-radius: 4px; font-weight: bold; }
  </style>
</head>
<body>
  <h1>CampusConnect Portal</h1>
  <p><span class="badge">ENVIRONMENT: GREEN (v2.0)</span></p>
  <p>Status: Welcome to the upgraded student experience!</p>
</body>
</html>
EOF
Code language: JavaScript (javascript)
Create a matching Dockerfile inside the green/ directory:
Bash
cat << 'EOF' > green/Dockerfile
FROM nginx:alpine
COPY index.html /usr/share/nginx/html/index.html
EXPOSE 80
EOF
Code language: JavaScript (javascript)
Step 4: Build the Docker Images
Build the container images for both versions from your root lab directory:
Bash
# Build Blue (v1.0)
docker build -t campusconnect:1.0 ./blue

# Build Green (v2.0)
docker build -t campusconnect:2.0 ./green
Code language: PHP (php)
Step 5: Run Both Application Containers
Run both containers in detached mode (-d), binding them to distinct local ports:
Bash
# Run Blue on port 8081
docker run -d --name app-blue -p 8081:80 campusconnect:1.0

# Run Green on port 8082
docker run -d --name app-green -p 8082:80 campusconnect:2.0
Code language: CSS (css)
Verify that both containers are running properly:
Bash
docker ps --format "table {{.Names}}\t{{.Status}}\t{{.Ports}}"
Code language: JavaScript (javascript)
Expected output:
Plaintext
NAMES        STATUS              PORTS
app-green    Up About a minute   0.0.0.0:8082->80/tcp
app-blue     Up About a minute   0.0.0.0:8081->80/tcp
Step 6: Test the Containers Directly
Verify that both containers respond with their respective content:
Bash
curl http://localhost:8081
curl http://localhost:8082
Code language: JavaScript (javascript)
At this stage, you have two independent environments running simultaneously on your machine. However, real users should not need to know which port is running which version. They need a single stable entry point.
Switching Traffic Between the Two Versions
To provide a single entry point, we will deploy an NGINX reverse proxy on port 8080. Users will only ever access http://localhost:8080. NGINX will decide whether to forward their requests to Blue (8081) or Green (8082).
                              [ Incoming Request ]
                               http://localhost:8080
                                         |
                                         v
                         +-------------------------------+
                         |      NGINX Reverse Proxy      |
                         |   upstream app_backend { ... }|
                         +---------------+---------------+
                                         |
                 +-----------------------+-----------------------+
                 | (When configured to 8081)                     | (When configured to 8082)
                 v                                               v
        +------------------+                            +------------------+
        | app-blue: 8081   |                            | app-green: 8082  |
        +------------------+                            +------------------+
Step 1: Configure NGINX to Point to Blue
Create an NGINX configuration file inside nginx/nginx.conf:
Bash
cat << 'EOF' > nginx/nginx.conf
events {
    worker_connections 1024;
}

http {
    # Define the active backend group
    upstream app_backend {
        # Initially routing traffic to the Blue environment
        server host.docker.internal:8081;
    }

    server {
        listen 80;

        location / {
            proxy_pass http://app_backend;
            proxy_set_header Host $host;
            proxy_set_header X-Real-IP $remote_addr;
            proxy_set_header X-Forwarded-For $proxy_add_x_forwarded_for;
        }
    }
}
EOF
Code language: PHP (php)
Note on
host.docker.internal: In Docker,host.docker.internalallows a container to route traffic back to services running on the host machine. If you are on Linux without host resolution flags, you can also connect containers using a shared user-defined Docker bridge network.
Step 2: Start the NGINX Reverse Proxy Container
Launch the proxy container, exposing port 8080 to the host:
Bash
docker run -d --name reverse-proxy \
  -p 8080:80 \
  --add-host=host.docker.internal:host-gateway \
  -v $(pwd)/nginx/nginx.conf:/etc/nginx/nginx.conf:ro \
  nginx:alpine
Code language: JavaScript (javascript)
Step 3: Verify the Initial Route (Serving Blue)
Make an HTTP request to the public-facing entry point on port 8080:
Bash
curl -s http://localhost:8080 | grep "ENVIRONMENT:"
Code language: JavaScript (javascript)
Expected output:
Plaintext
<p><span class="badge">ENVIRONMENT: BLUE (v1.0)</span></p>
Your users are happily using CampusConnect Version 1.0.
Step 4: Perform the Traffic Cutover to Green
To switch all traffic to Version 2.0, update the upstream directive in nginx/nginx.conf so it targets port 8082 instead of 8081:
Bash
cat << 'EOF' > nginx/nginx.conf
events {
    worker_connections 1024;
}

http {
    upstream app_backend {
        # Cutover: Route all incoming traffic to Green
        server host.docker.internal:8082;
    }

    server {
        listen 80;

        location / {
            proxy_pass http://app_backend;
            proxy_set_header Host $host;
            proxy_set_header X-Real-IP $remote_addr;
            proxy_set_header X-Forwarded-For $proxy_add_x_forwarded_for;
        }
    }
}
EOF
Code language: PHP (php)
Step 5: Reload NGINX Without Dropping Connections
One of NGINX’s key strengths is its ability to reload configurations on the fly without terminating active worker threads:
Bash
docker exec reverse-proxy nginx -s reload
Step 6: Verify Traffic Now Lands on Green
Send another request to the public port:
Bash
curl -s http://localhost:8080 | grep "ENVIRONMENT:"
Code language: JavaScript (javascript)
Expected output:
Plaintext
<p><span class="badge">ENVIRONMENT: GREEN (v2.0)</span></p>
The cutover is complete. The application transitioned from Version 1.0 to Version 2.0 with no connection termination, no dropped packets, and zero downtime.
What Happens If the New Release Fails?
Now let us look at the reverse scenario: what happens when a release goes wrong?
Imagine that twenty minutes after switching traffic to Green (Version 2.0), the support team starts receiving alerts. When students attempt to access their exam grades, the application logs an unhandled null-pointer exception, throwing HTTP 500 errors.
1. Problem Detection:
   [ Users ] ----> [ Proxy :8080 ] ----> [ Green :8082 ] ====> HTTP 500 Internal Error!

2. Instant Rollback:
   Update NGINX Upstream back to 8081 & reload proxy

3. Restored Stability:
   [ Users ] ----> [ Proxy :8080 ] ----> [ Blue :8081 ]  ====> HTTP 200 OK (v1.0 Restored)
Code language: JavaScript (javascript)
Executing the Instant Rollback
In an in-place deployment, engineers would now be panicking, searching for old release packages, or trying to debug live code on production servers.
With Blue-Green Deployment, your recovery procedure is simple: point the router back to Blue.
- Re-edit
nginx/nginx.confto target port8081:Bashsed -i 's/8082/8081/' nginx/nginx.conf - Reload NGINX:Bash
docker exec reverse-proxy nginx -s reload - Verify that the stable version is immediately back online:Bash
curl -s http://localhost:8080 | grep "ENVIRONMENT:"Output:Plaintext<p><span class="badge">ENVIRONMENT: BLUE (v1.0)</span></p>
Within seconds, your platform is stable again. The broken Green container remains up and running on port 8082, completely isolated from users. Developers can attach debuggers, inspect runtime state, and pull full stack traces from Green at their own pace without impacting a single customer.
The Real-World Complexity: Database Rollbacks
While swapping compute instances back to Blue is trivial, stateful storage introduces challenges:
- What if Green inserted new records? If Green wrote transactions into the shared database for fifteen minutes before the rollback, those records might have schema fields that Blue does not recognize.
- The Rule of Backward Compatibility: Database migrations must always be decoupled from application code releases using the Expand-Contract Pattern:
- Expand Phase: Add new database columns or tables without removing old ones. Ensure the database supports both v1.0 and v2.0 queries concurrently.
- Switch Phase: Deploy and switch application code to v2.0.
- Contract Phase: Days later, after v2.0 is completely verified and Blue is retired, run a cleanup migration to drop the old, deprecated columns.
Taking Blue-Green Deployment Into Kubernetes
In containerized cloud environments managed by Kubernetes, you don’t manually maintain proxy configuration files. Instead, you use native Kubernetes primitives: Deployments, Services, and Labels.
                           +----------------------+
                           |  Kubernetes Service  |
                           |   name: web-service  |
                           |  selector:           |
                           |    app: campus       |
                           |    version: blue     | <--- Switch label to "green"
                           +----------+-----------+
                                      |
                     +----------------+----------------+
                     |                                 |
                     v                                 v
          +---------------------+            +---------------------+
          | Deployment: web-blue|            |Deployment: web-green|
          | Pods: [v1] [v1]     |            | Pods: [v2] [v2]     |
          | Labels:             |            | Labels:             |
          |   app: campus       |            |   app: campus       |
          |   version: blue     |            |   version: green    |
          +---------------------+            +---------------------+
How Kubernetes Manages the Routing
A Kubernetes Service acts as an internal load balancer. It uses a selector field (a set of key-value pairs) to determine which Pods receive incoming network traffic.
By simply updating the version key in the Service’s selector, Kubernetes automatically updates its internal endpoints list (Endpoints or EndpointSlices), instantly directing traffic from the Blue Pods to the Green Pods.
Illustrative Kubernetes Manifest (blue-green.yaml)
YAML
# 1. The Blue Deployment (v1.0 - Currently Active)
apiVersion: apps/v1
kind: Deployment
metadata:
  name: campusconnect-blue
  labels:
    app: campusconnect
    version: blue
spec:
  replicas: 2
  selector:
    matchLabels:
      app: campusconnect
      version: blue
  template:
    metadata:
      labels:
        app: campusconnect
        version: blue
    spec:
      containers:
      - name: web
        image: campusconnect:1.0
        ports:
        - containerPort: 80
        readinessProbe:
          httpGet:
            path: /
            port: 80
          initialDelaySeconds: 5
          periodSeconds: 5
---
# 2. The Green Deployment (v2.0 - Candidate Release)
apiVersion: apps/v1
kind: Deployment
metadata:
  name: campusconnect-green
  labels:
    app: campusconnect
    version: green
spec:
  replicas: 2
  selector:
    matchLabels:
      app: campusconnect
      version: green
  template:
    metadata:
      labels:
        app: campusconnect
        version: green
    spec:
      containers:
      - name: web
        image: campusconnect:2.0
        ports:
        - containerPort: 80
        readinessProbe:
          httpGet:
            path: /
            port: 80
          initialDelaySeconds: 5
          periodSeconds: 5
---
# 3. The Active Service (Router)
apiVersion: v1
kind: Service
metadata:
  name: campusconnect-service
spec:
  type: LoadBalancer
  ports:
  - port: 80
    targetPort: 80
  selector:
    app: campusconnect
    version: blue   # Traffic currently routes to the Blue Pods
Code language: PHP (php)
Performing the Cutover in Kubernetes
To switch all traffic to the Green version in Kubernetes, you execute a single command to patch the Service’s label selector:
Bash
kubectl patch service campusconnect-service -p '{"spec":{"selector":{"version":"green"}}}'
Code language: JavaScript (javascript)
Within a few milliseconds, the service updates its endpoints. All incoming requests hitting campusconnect-service route straight to the Green pods.
If you encounter issues, rolling back is just as quick:
Bash
kubectl patch service campusconnect-service -p '{"spec":{"selector":{"version":"blue"}}}'
Code language: JavaScript (javascript)
Automating Blue-Green Releases With CI/CD
In production systems, deployment steps are never executed manually from an engineer’s laptop. Instead, they are orchestrated through an automated CI/CD pipeline using platforms like GitHub Actions, GitLab CI, or Jenkins.
+------------+     +------------+     +-------------+     +-------------+     +------------+
| 1. Code    |     | 2. Unit &  |     | 3. Build &  |     | 4. Deploy   |     | 5. Run     |
| Commit     | --> | Integration| --> | Publish OCI | --> | to Inactive | --> | Smoke Tests|
|            |     | Tests      |     | Image       |     | Environment |     | on Green   |
+------------+     +------------+     +-------------+     +-------------+     +-----+------+
                                                                                    |
                                                                                    v
+------------+     +------------+                                             +------------+
| Complete / |     | 7. Flip    |                                             | 6. Manual  |
| Clean Blue | <-- | Router to  | <------------------------------------------ | Approval   |
| After Soak |     | Green      |                                             | Gate       |
+------------+     +------------+                                             +------------+
Key Stages of an Automated Pipeline
- Source Code Checkout & Linting: Pull the latest code commit and verify formatting and syntax standards.
- Automated Testing: Run unit tests, security audits, and code coverage checks. If any test fails, the pipeline halts immediately.
- Artifact Packaging: Build the immutable container image and push it to a private container registry (such as Docker Hub, Amazon ECR, or GitHub Packages).
- Deploy to Idle Target: The pipeline determines which environment is currently idle (Green) and updates its deployment specification with the newly built container image.
- Synthetic Health Validation: The pipeline sends automated HTTP probes directly to the Green environment to verify that services are healthy and responsive before any public routing occurs.
- Approval Gate (Optional): Many teams implement a manual approval button in their CI/CD tool, allowing engineering leads to review test reports before authorizing the production switch.
- Traffic Cutover: The pipeline updates the router or Kubernetes service selector to switch traffic over to Green.
- Post-Deployment Verification: Automated smoke tests run against the live domain to verify user-facing functionality.
Example: GitHub Actions Workflow (deploy.yml)
Here is an illustrative CI/CD configuration demonstrating how these logical stages translate into executable automation:
YAML
name: Production Blue-Green Release

on:
  push:
    branches:
      - main

jobs:
  build-and-test:
    runs-on: ubuntu-latest
    steps:
      - name: Check out repository
        uses: actions/checkout@v4

      - name: Run Unit Tests
        run: |
          echo "Executing test suite..."
          # npm test or pytest would execute here
          exit 0

      - name: Build and Push Docker Image
        run: |
          echo "Building campusconnect:${{ github.sha }}..."
          # docker build -t myregistry/campusconnect:${{ github.sha }} .
          # docker push myregistry/campusconnect:${{ github.sha }}

  deploy-to-green:
    needs: build-and-test
    runs-on: ubuntu-latest
    steps:
      - name: Deploy Image to Inactive Environment (Green)
        run: |
          echo "Deploying image ${{ github.sha }} to campusconnect-green..."
          # kubectl set image deployment/campusconnect-green web=myregistry/campusconnect:${{ github.sha }}
          # kubectl rollout status deployment/campusconnect-green

      - name: Execute Health Probes on Green
        run: |
          echo "Running end-to-end synthetic checks on internal Green endpoint..."
          # curl --fail http://internal-green.campusconnect.local/health || exit 1

  traffic-cutover:
    needs: deploy-to-green
    runs-on: ubuntu-latest
    steps:
      - name: Switch Traffic Router to Green
        run: |
          echo "Updating Kubernetes Service selector to point to Green..."
          # kubectl patch service campusconnect-service -p '{"spec":{"selector":{"version":"green"}}}'

      - name: Post-Release Verification
        run: |
          echo "Verifying public endpoint status..."
          # curl --fail https://campusconnect.edu/api/status || exit 1
Code language: PHP (php)
Common Mistakes Students Should Learn to Avoid
When implementing Blue-Green deployments for the first time, junior engineers frequently encounter several subtle pitfalls:
1. Neglecting the Health Check Phase
The single biggest mistake is updating Green and immediately switching traffic without thorough validation. Always verify readiness probes and synthetic endpoints on Green before touching the router. If you switch traffic to an unvalidated environment, you risk serving immediate errors to all active users.
2. Forgetting to Test the Rollback Path
Teams often plan how to cut traffic over to Green, but fail to test flipping traffic back to Blue. Run regular rollback drills in lower environments to ensure the return path is quick, functional, and reliable under pressure.
3. Introducing Breaking Database Migrations
If Release 2.0 deletes a database column that Release 1.0 relies on, rolling back to Blue is impossible without data recovery efforts. Always follow the Expand-Contract database pattern: expand schemas additively, deploy code, verify stability, and contract old fields only after deprecation.
4. Permitting Configuration Drift
If an engineer logs into Blue via SSH to manually update an environment variable, install an OS patch, or adjust a configuration file, Green will lack those changes unless everything is codified. Treat all infrastructure as code, and treat servers as immutable artifacts.
5. Terminating the Inactive Environment Too Soon
Do not tear down or clean up Blue immediately after switching traffic to Green. Keep the previous environment intact for an established stabilization period (often a few hours to a full business day). This ensures your quick rollback option remains viable while users explore newly released features.
6. Overlooking Asynchronous Background Jobs
Web applications do not just process incoming HTTP requests; they also run background queues (e.g., Celery, RabbitMQ, Kafka consumers). If both Blue and Green background workers run concurrently against the same queue, you might process billing events or emails twice, or process messages using mismatched logic. Ensure background workers transition in tandem with web traffic.
Small Practice Challenges to Test Your Understanding
To solidify your mental model of Blue-Green architectures, try completing these hands-on exercises in your local laboratory setup:
- Challenge 1: Add a Health-Check Endpoint
- Task: Modify the NGINX configuration inside the Blue and Green containers to expose a dedicated
/healthzlocation block returning an HTTP 200 status code. - Learning Outcome: Understand how automated load balancers and orchestrators evaluate container health before routing live traffic.
- Task: Modify the NGINX configuration inside the Blue and Green containers to expose a dedicated
- Challenge 2: Inject a Simulated Release Failure
- Task: Deliberately misconfigure the Green container so it returns an HTTP 500 Internal Server Error. Execute the traffic switch, detect the failure using
curl, and practice rolling back to Blue within 30 seconds. - Learning Outcome: Build real-world muscle memory for incident response and rapid rollback.
- Task: Deliberately misconfigure the Green container so it returns an HTTP 500 Internal Server Error. Execute the traffic switch, detect the failure using
- Challenge 3: Transition to a Shared Docker Network
- Task: Refactor the lab to remove
host.docker.internal. Create a dedicated user-defined Docker bridge network (docker network create lab-net), place all three containers inside it, and reference them by container name (app-blueandapp-green) insidenginx.conf. - Learning Outcome: Master container-to-container service discovery and local virtual networking fundamentals.
- Task: Refactor the lab to remove
- Challenge 4: Implement the Lab on Kubernetes (Minikube or Kind)
- Task: Take the manifests provided in Section 10 and deploy them to a local Minikube or Kind cluster. Use
kubectl patchto execute both deployment cutover and rollback. - Learning Outcome: Transition your conceptual understanding from basic container runtimes to enterprise-grade Kubernetes orchestration.
- Task: Take the manifests provided in Section 10 and deploy them to a local Minikube or Kind cluster. Use
Frequently Asked Questions
What is Blue-Green Deployment in DevOps?
Blue-Green Deployment is a release management strategy where two identical environments (designated Blue and Green) exist side-by-side. One environment serves live production traffic while the other hosts the newly deployed version for validation. Once verified, traffic is redirected to the new environment, minimizing downtime and simplifying rollbacks.
Why are two environments used in Blue-Green Deployment?
Two environments allow engineering teams to deploy, configure, warm up, and thoroughly test an application update without touching or destabilizing the running service. It separates deployment (installing the software) from release (exposing it to end users).
Does Blue-Green Deployment completely eliminate downtime?
In most scenarios, yes. Because the new version is fully running and initialized on the inactive environment prior to the switch, swapping router targets occurs in milliseconds. However, if your application requires heavy, non-additive database migrations that lock tables, brief maintenance windows may still be necessary.
What is the primary role of a load balancer in this strategy?
The load balancer (or reverse proxy) acts as the central traffic switchboard. It presents a stable entry point (IP address or domain name) to public users and controls which internal cluster of servers receives traffic via its upstream routing rules.
How is a rollback performed during a failed deployment?
Rollback is performed by instructing the load balancer or service router to point back to the previous environment. Because the previous environment remains intact and running in the background, rollback takes seconds rather than the minutes or hours required by in-place re-installations.
Can I practice Blue-Green Deployment using just Docker on a laptop?
Yes. As shown in our hands-on lab, you can run two separate application containers on different ports and place a lightweight NGINX container in front of them to act as the traffic router. This provides an effective local sandbox for learning the workflow.
Can Kubernetes manage Blue-Green Deployments natively?
Yes. Kubernetes handles Blue-Green deployments cleanly using Deployments and Services. By modifying the label selector of a Kubernetes Service (for instance, changing version: blue to version: green), the service shifts traffic across Pod groups.
What is the main difference between Blue-Green and Canary Deployment?
Blue-Green shifts 100% of user traffic from the old version to the new version all at once after validation. Canary deployment shifts traffic incrementally (e.g., 2%, 10%, 50%, 100%) to observe how the new version behaves under actual production workloads before committing to a full rollout.
Final Learning Takeaway: Understand Releases by Practicing Them
Modern software engineering prioritizes speed, reliability, and safety. Building features is only half the battle; delivering those features into the hands of users without causing outages, corrupting state, or degrading performance is what separates mature engineering organizations from chaotic ones. Blue-Green Deployment provides a structured, predictable framework for achieving safe releases. By decoupling application installation from traffic routing, it gives engineering teams the freedom to test thoroughly in production-like environments and ensures an instantaneous safety net if things go wrong. As you continue your DevOps learning journey, remember that conceptual understanding truly clicks when you get your hands dirty. Set up local Docker containers, write NGINX proxy rules, build Kubernetes manifests, and practice breaking and restoring your own releases. Building this muscle memory in a local laboratory gives you the confidence to manage mission-critical deployments in real-world production environments.