Here are the steps to set up Flutter in VS Code and create/run a Flutter project:
- Install Flutter by following the instructions on the Flutter website for your operating system.
- Install the Dart SDK by following the instructions on the Dart website for your operating system.
- Open VS Code and install the Flutter and Dart plugins.
- Open the Command Palette by pressing Ctrl+Shift+P (Windows/Linux) or Cmd+Shift+P (macOS).
- Type “Flutter: New Project” and press enter.
- Choose a project location and enter a project name.
- Wait for the project to be created.
- Open the main.dart file in the lib folder.
- Replace the contents of the file with the following code:
import 'package:flutter/material.dart';
void main() {
runApp(MyApp());
}
class MyApp extends StatelessWidget {
@override
Widget build(BuildContext context) {
return MaterialApp(
title: 'Flutter Demo',
home: Scaffold(
appBar: AppBar(
title: Text('Flutter Demo'),
),
body: Center(
child: Text('Hello, World!'),
),
),
);
}
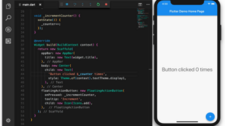
}Code language: JavaScript (javascript)Press F5 to run the app in debug mode.
Wait for the app to launch in the emulator or on a physical device.
Congratulations, you have successfully set up Flutter in VS Code and created/ran a Flutter project!